![]()
![]()
Go to Activities>>Inspection Master>>Print>>Custom Forms and Letters
This program allows the user to select forms or letters that have been setup in the Merge Template to be printed with merged tenant information.
Displays the selected Inspection #, A different Inspection # may be selected for the letter or form.
The following address information for the unit, site or building will be displayed based on the selected Inspection #:
Address 1
Address 2
Apt Number
City
State
Zip Code
In the letters window/grid are displayed forms and letters that have been setup in the merge template. Click in the box to checkmark a letter/form to select it for printing.
Click the print button to bring up the print options dialog box. The form may still be previewed if preview is selected in the Direct to... field.
The letter date field is a merge field that may be included in forms or letters. The merged field will print any date that is entered or selected here.
Has only one selection of All Categories.
The displayed forms/letters may be viewed in one of the following orders:
Letter Code - this is the code that the letter/form is setup under in the merge template. The letter code is not displayed in Custom Forms and Letters.
Description - the description that was entered for the letter code in the merge template and is displayed in Custom Forms and Letters.
Note:
All forms/letters will still be grouped under their Letter Type (verification group).
The default Letter Sort order may be set in Tenant Management.
This box may be checked to override some of the print/preview options set in the Merge Template for the form/letter.
For a first time print, I would leave this box unchecked.
This box may be checked to force a print dialog box to be displayed for the selected form/letter.
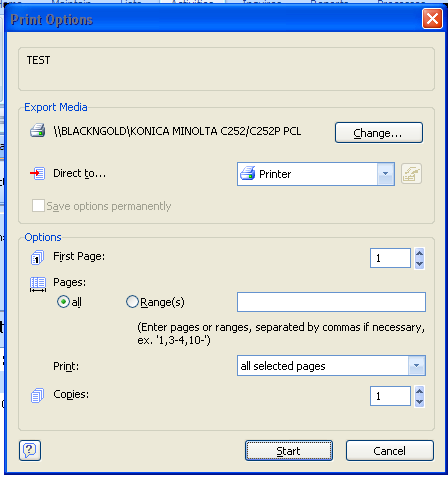
The name of the merge letter is displayed at the top of the dialog box.
Click Start
The letter or form will be sent to the printer displayed under Export Media
With the Print Option box open...
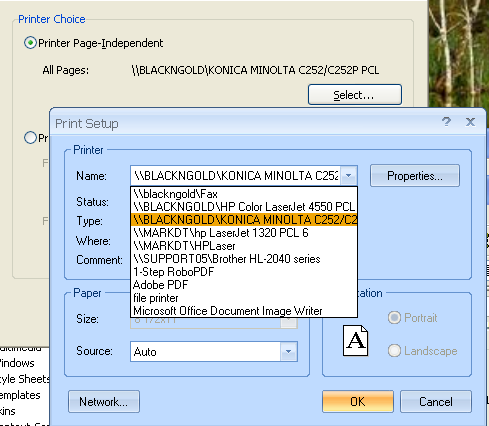
Click the Change... button to bring up a printer choice box.
Click the Select... button
Click the down arrow and select a different printer
Click OK after a printer has been selected to return to the Print option box
Click Start to print
Example:
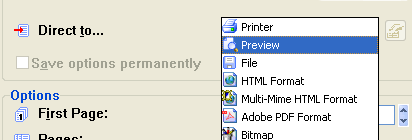
Across from "Direct to..."
Click the menu arrow and select Preview from the list
Click Start
Example: