![]()
![]()
Clear Screen
Save Information
Room Options
Go to Clear Screen
This icon will clear the Inspection Information that is showing on the screen. If information has been changed and has not been saved, a confirmation box like the one below will come up:
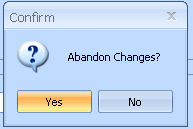
Changes will be not be saved and the screen will be cleared.
The screen will not be cleared. Use the Save Inspection button to save the changes and then use the Clear Screen icon to clear the screen.
The icon is only available/active when inspection information has been pulled up and is showing on the screen.
Go to Save Inspection
This function will save the inspection information.
The icon is only available/active when inspection information has been pulled up and showing on the screen.
Go to Room Options
This icon opens a drop down menu with the following functions:
Edit a Room
Delete a Room
Go to Room Options>>Add a Room
This program will add rooms to the unit that is in the process of being inspected.
Rooms may have already been added for the unit and this program may be skipped.
Select a room from the list.
Rooms are setup and maintained by users in the Main Inspection program in the Inspectable Area/Room Master
Select one of the following that best describes where the room is located:
N/A
1st Floor
2nd Floor
3rd Floor
4th Floor
5th Floor
Basement
Enter or increment to a number to assign to the room.
Select one of the following:
Center
Left
Right
Select one of the following:
Center
Front
Rear
Type in any other descriptive information regarding the room.
Click the OK button to save the room information entered.
Clicking the cancel button will close the Add a Room program without saving entered information.
Go to Room Options>>Edit a Room
Use this function to edit the room that has been selected under the Room Inspections tab.
When a room has been selected under Room Inspections, the Room Type to Add will automatically be selected.
If a different room type is selected for this room, it will update/overwrite the room information already selected under Room Inspections.
The information displayed for the selected room may be left as is or edited by selecting one of the following that best describes where the room is located:
N/A
1st Floor
2nd Floor
3rd Floor
4th Floor
5th Floor
Basement
The room number may be left as is or may be edited by entering or incrementing to another number to assign to the room.
The displayed location, if any, may be left as is or it may be edited.
Select one of the following to assign or edit:
Center
Left
Right
The displayed location, if any, may be left as is or it may be edited.
Select one of the following to assign or edit:
Center
Front
Rear
A previously entered description may be accepted as is or may be edited.
Click the OK button to save the room information entered.
Clicking the cancel button will close the Edit a Room program without saving entered information.
This function will delete the room selected on the Room Inspections tab.
The following Question box will appear to confirm the deletion:
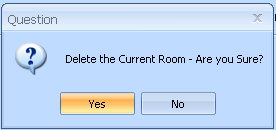
Clicking the Yes button will delete the selected room.
Clicking the No button will close the program without deleting the room.