
Process Payroll
Before you begin processing payroll, changes to employee records in the Employee Master should be entered.
Automatic Setup Time Cards
 NAVIGATION: ACTIVITIES menu > Auto-Setup Time Cards
- Select your Pay Frequency (Weekly, Bi-Weekly, Semi-Monthly or Monthly)
- Enter or select the Pay Date you are processing and press tab
- The default Earning Cycles to Process will be displayed but will be dimmed and un-selectable.
- These cycles will usually be correct and should not be changed.
- For special pays you may change these. Enter a checkmark in the Change Default Cycles box, and then remove or add cycles.
- Place a checkmark in "Break Out Holiday Time?" if employees are paid for holidays and you have a holiday setup in the Holiday Master that occurs during the payroll period.
- If you have entered a checkmark in "Break Out Holiday Time?", enter or select the Holiday Code which is the Earning Code for the Holiday Pay.
- Click the Process Time Cards button on the Quick Links bar, to create entries in the time cards for employees based on the earnings setup in their Employee Master files that have a checkmark in the TC column.
- Click PROCESS TIME CARDS.
- PAYROLL NOTES
- Do not run the Auto-Setup Time Cards process more than once per pay. Running the process more than once will double the timecard earnings.
- If you need to remove all of the timecard information and start over, you may go to Utilities > Import Time Card Information and run the import process.
- Select Horizon Standard Import GL Version as the Import Type and place a checkmark in the Initialize Time Card File box.
- You will not need to enter a Time Card Date.
- Press Import Process on the Quick Links bar to remove all timecard information, you may receive an error that will close the payroll program (because a file was not selected).
- Re-open payroll, run the Time Card Register to verify that all timecard information was deleted, and run Auto-Setup Time Card again.
- For more information on the import process, please read How to Import Timecard Data.
- If you are doing a special pay where time cards are not needed for every employee or if the regular earning amounts would not be correct, the Auto Setup of Time Cards may be skipped and time may be entered directly into Time Card Entry.
Time Card Entry
NAVIGATION: ACTIVITIES menu > Time Card Entry
- Enter or select an Employee #
- Review the time card information from the Auto Setup of Time Card process.
- Enter time for a special pay, or add additional time such as sick, vacation, over time, etc.
- You should always adjust the main Hourly line last, as this line will self-adjust as you enter new lines.
- If there are no adjustments for the employee, click Save or Clear All and select the next employee to review
- Enter or select the Time Card Date or accept the default date
- Enter or select an Earning Code
- View, enter or edit the Hours (salary earning codes may be zero)
- View, enter or edit the Rate
- Select an Auto Group option (not available if in Department mode)
- A distribution table must be setup and correspond to an Auto 1-4 in the Employee Master > Distribution tab for the employee
- Select NO for an employee without a distribution table or if the earnings should be applied to a different general ledger account number
- Make sure to use the appropriate Inter-fund Code if you are using "Interfund Payroll"
- View, edit or enter a General Ledger Account or Department unless an Auto Group was selected
- Tab through each new line until it saves to the grid below.
- To delete a line from the grid/time card:
- Check the EDIT checkbox on the line you want to delete
- Click DELETE
- Click YES to delete the record
- When finished with an employee, hit SAVE and repeat this process until all time cards are complete.
- The Quick Calculation button may be pressed to view earnings for this pay for the employee. A change may be made for this pay only in the Quick Calculation Viewer for the following fields:
- Federal
- Social Security
- Medicare
- State
- Deduction Amounts shown in the grid
- Click OK when you are done to save the changes or Cancel to return to Time Card Entry without saving.
- Click Close when you are done with all of the employees.
Time Card Register
NAVIGATION: ACTIVITIES menu > Time Card Register
- The register will print information for both Hourly and Salary Employees unless the default check marks are removed from one of the squares.
- Enter checkmarks in one or more of the following options:
- Print Entitlement Warnings - will display warnings, when checked, for employees that will use more hours than are currently available.
- Print High Hours/Amount Warnings (High amounts must be set in the Earnings Master for each earnings code that you want warnings to print on)
- Print High Individual Earnings Warnings (High amounts must be set in the Earnings Master for each earnings code that you want warnings to print on)
- Preview or Print the report and review for errors. This report may be reprinted or viewed until the payroll has been posted when it is removed.
- If errors are found, go back edit the Time Cards.
Start Payroll Process
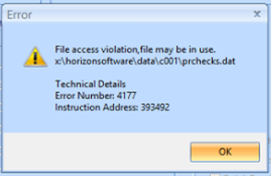
 Only one person can process payroll at a time. No other users can be in the Payroll system when payroll is being processed. If you are trying to process payroll and receive the error FILE ACCESS VIOLATION, FILE MAY BE IN USE shown below, someone else is logged into the payroll program. Have them log out of the program and the error will be resolved.
Payroll Processing Wizard
The Payroll Processing Wizard will walk you through the steps to complete your payroll. Depending on settings/setup, different features may or may not apply to your company. The steps below include all possible options, i.e., automatic system check, AP processing, etc. Contact the Horizon Help Desk if you need assistance with processing payroll or setting up any of the automatic features detailed below.
NAVIGATION: ACTIVITIES menu > Process Payroll
Step 1 - Pay Information
- Enter or select the Pay Date
- The Pay Date must match the pay date setup in the Pay Date Master. If the date of the check needs changed because of holidays or other non-banking days, go to the Pay Date Master and change the Pay Date.
- A confirmation message will be displayed if the pay date is more than one month from the current date. Verify the dates and click Yes to continue or No to stop and adjust the dates.
- Place a check mark in the appropriate Pay Frequencies to Process.
- More than one frequency for the same date may be processed at the same time.
- Review the Standard Deduction Cycles to Process for the selected frequency
- Frequency information will usually be correct and should not be changed.
- For special pays you may change, remove or add cycles.
- If you are processing a special pay the following may be checked:
- Process Only Mandatory Deductions (only deductions with Mandatory checked in the Deduction/Benefit Master will be taken out) use this for special pays, such as a bonus pay, that you do not want to duplicate deductions that have already been taken.
- Print Checks for All Employees (No Direct Deposit)
- Quick Run (Company YTD Disabled)
- Click NEXT
- If your system is setup to do so, the Automatic System Check will run.
- If there are no errors are found, the payroll calculation process will begin.
- If there are keying errors that will prevent payroll from processing, the Payroll Error Checking Report will display.
- You will get a report similar to the following that will list possible set-up errors in your payroll, including certain types of errors in Time Card Entry related to incorrect or invalid GL accounts and Inter-fund Codes. (If you get an error when the report is generating, please call the Horizon Help Desk to update your report file and location.)

- Review the report and fix any identified errors. Contact the Horizon Help Desk for assistance with correcting errors if necessary.
- The report will list the program section, error description and references that need to be reviewed and/or fixed.
- Fix the errors on the report and restart the Process Payroll.
- You will get a report similar to the following that will list possible set-up errors in your payroll, including certain types of errors in Time Card Entry related to incorrect or invalid GL accounts and Inter-fund Codes. (If you get an error when the report is generating, please call the Horizon Help Desk to update your report file and location.)
- As Needed System Check
- To run the System Check as needed, prior to Payroll Processing, go to TOOLS menu > System Check and press the Check System button.
- Once all errors are corrected, the system will calculate the payroll based on the information on the time cards and the Employee Master setup.
Step 2- Pre Check Writing Report
- Click PREVIEW to see the report on the screen. Click PRINT to print the report.
- Review the pre-check writing report for correct time, gross wages, deductions, and benefits.
- If you need to make any edits, close the Payroll Processing wizard.
- Make your correction
- Begin the payroll process again.
- The program will ask you if you want to recalculate and you should click YES
- Click the Payroll Expense Summary - Additional Calculation Required button to review the report.
- This report can only be printed.
- When you click the button, the report will generate and display the PRINT dialog box when ready to print.
- When you are satisfied that the pre-check report and expense summary are correct, click NEXT.
Step 3 - Print Checks
If you do not print paper checks, click NEXT twice to skip the print check process. Go to Step 5.
- If you print paper checks, the STARTING CHECK # should be the next check number.
- Click the CHECK PRINTER button and select the printer.
- If you print signatures on your checks and have a password to print the signature setup, you will be prompted to enter the Signature Password.
- If left blank the program will display "Signature Password Does not Match - Print Without Signature?"
- Click NO to return to Print Checks and enter the password
- Click YES to print the checks without the signature
- If left blank the program will display "Signature Password Does not Match - Print Without Signature?"
- Click PRINT CHECKS.
- Once the checks printed, click NEXT.
Step 4 - Check Verification
- Review the printed check to verify they printed correctly. Checks may stick together, toner may leave blank areas on checks, paper jam ruined check, etc.
- The screen will display the check number assigned to each employee.
- The last column will show PRINTED.
- If a check did not print properly, place a check on the check number/employee.
- CLEAR - click the CLEAR button to reprint the check.
- The last column will change to SET TO PRINT.
- Click BACK to reprint the check. Make sure to re-verify the starting check number.
- Use clear when checks stuck together during printing.
- VOID - click the VOID button to void the check.
- Use VOID if the check was destroyed during printing.
- The last column will change to SET TO PRINT.
- Click BACK to reprint the check. Make sure to re-verify the starting check number.
- CLEAR - click the CLEAR button to reprint the check.
- Once all checks have been printed correctly, click NEXT.
Step 5 - Print Deposit Slips
Any employee setup to receive their pay by direct deposit will have a direct deposit slip print. If you use the Horizon DocumentViewer, skip to Step 7.
- Verify the STARTING DEPOSIT SLIP #. Typically you never need to adjust this number.
- Click the DEPOSIT SLIP PRINTER button and select the printer.
- Click PRINT DEPOSIT SLIPS.
- Once the deposit slips have printed, click NEXT.
Step 6 - Deposit Slip Verification
- Review the deposit slips to verify they printed correctly. Paper may stick together, toner may leave blank areas, paper jam, etc.
- The screen will display the slip number assigned to each employee.
- The last column will show PRINTED.
- If a slip did not print properly, place a check on the check number/employee.
- CLEAR - click the CLEAR button to reprint the slip.
- The last column will change to SET TO PRINT.
- Click BACK to reprint.
- Use clear when paper stuck together during printing.
- VOID - click the VOID button to void the check.
- You typically would never need to use the VOID button when printing deposit slips.
- CLEAR - click the CLEAR button to reprint the slip.
- Once all SLIPS have been printed correctly, click NEXT.
Step 7 - Accounts Payable Checks
If you use the Horizon Financials Management software, the AP Wizard will process the AP voucher/automatic payment in Financials. If your system is setup to use the AP feature, the AP Wizard will appear.
- Review the AP check information shown in the Grid. The following fields may be edited:
- Process Mode
- Employer Amount
- Employee Amount
- Click Launch AP Interface Wizard button.
- If you do not click the launch button but click NEXT to move to the next step, the system will prompt you that the AP Wizard was not run.
- Click YES to continue without running the wizard.
- Click NO to return to the screen and run the wizard.
- Click NEXT to move to Check Processing - Print Checks for the payroll liabilities.
- Verify that the next check number and check printer are correct
- Enter the Signature Password, if required
- Click Print Checks
- Once the checks have printed, click NEXT to move to the Verification Screen.
- If you need to reprint checks, follow same procedure as for AP check printing.
- Once all checks have printed correctly, click NEXT.
Step 8 - Post Checks
- To complete the payroll process, click FINISH to post.
- If you use the AP Wizard, the next step will print the AP Posting report.
- The screen will return to the AP Processing screen.
- The AP posting report will be sent to the printer.
- Click OK to print the report.
- Click NEXT
- Click FINISH
- When the posting process is complete, click YES to print the register or save the report.
Step 9 - Process ACH File
- If Payroll has been setup to automatically process an ACH file to submit the direct deposit to the bank, the program will generate the file AFTER the posting register has printed.
- The ACH file will be created/saved in the default location initially setup.
- Once the file is created, the ACH Summary report will automatically print.
- Submit the file to your bank following their directions.
- Make sure to verify the upload amount matches the payroll posting register.
Step 10 - DocumentViewer Upload
If subscribe to this service, direct deposit slips can be sent to the Horizon DocumentViewer. This allows staff to log into the site and view/print their direct deposit slip.
- If your company uses the DocumentViewer service, a Send to DocumentViewer Now? message will be shown.
- Click "Yes" to send the information now or "No" to send the information later using the "Interface to DocumentViewer" utility.
- Payroll information should always be sent to DocumentViewer before another check run is started.
Restarting the Payroll Processing Wizard
If you need to close the Payroll Processing wizard at any step to correct errors in the Employee Master setup or adjust time cards, when you restart PROCESS PAYROLL button again, a message will display that checks already exist.
The errors you corrected will depend if you recalculate.
- Click NO if checks calculated properly and you do not want to remove information that may already be processed for this check run
- Click YES to recalculate - this will remove any previous calculation information and checks printed information
See Also:
Send Attachments to DocumentViewer