
Consumer Time Tracking - Individual Entry
The consumer time tracking feature gathers the information required to meet the Electronic Visit Verification (EVV) requirements. This process can also be used to enter non-EVV services.
Start Punch
 NAVIGATION: TRANSACTIONS menu > Consumer Time Tracking
- Select the consumer by typing the case number in the CASE NUMBER field or use the browse button to view the list of all consumers.
- The consumer name and case number will auto-populate at the top of the screen.
- Click the NEW button on the right side of the screen.
- The TIME SHEET ENTRY dialog box will appear. The following information will automatically appear and cannot be changed (unless by a system administrator):
- CONSUMER: The consumer name and case number selected in the first step.
- DATE/TIME: The date and start time (based on your computer settings) will appear.
- STAFF NAME: The STAFF NAME field will display the name of the user logged into the system.
- Complete the DETAIL section:
- FACILITY: Select the facility the consumer is being checked into. Only the facilities the consumer is OPEN to will be displayed in the list of available options.
- SERVICE: Select the service being provided; only the authorized services for the consumer will be displayed in the list of available options.
- LOCATION: The options displayed will depend on the service selected, i.e., home, community, facility, etc.
- Once all information is completed, click the SAVE LINE button.
- On the Consumer Time Tracking screen, you will see the entry in the grid without a TIME OUT listed.
End Punch
NAVIGATION: TRANSACTIONS menu > Consumer Time Tracking
- Select the consumer by typing the case number in the CASE NUMBER field or use the browse button to view the list of all consumers. The consumer name and case number will auto-populate at the top of the screen.
- In the grid, you will see the entries for the consumer for the day selected. Select the line you want complete by clicking on the line.
- Review the information on the TIME SHEET ENTRY dialog box. Make any changes necessary.
- Click SAVE LINE.
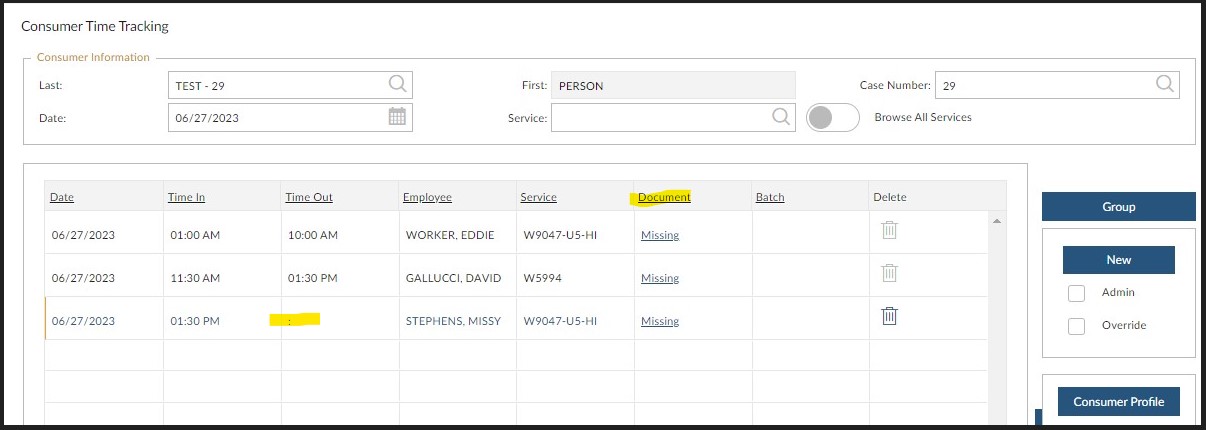
Documentation
- If documentation is set-up in your system, in the DOCUMENT column you will see the word MISSING.
- Click on the link to start the documentation.
- When you finish and save your documentation, the word in the Time Tracking grid will now display as COMPLETE.
Delete a Punch
If a note was completed, you will not be able to delete an entry. Contact your system administrator to assist.
- Select the consumer by typing the case number in the CASE NUMBER field or use the browse button to view the list of all consumers. The consumer name and case number will auto-populate at the top of the screen.
- In the grid, you will see the entries for the consumer for the day selected.
- At the end of the line that you want to delete, click the DELETE icon (trash can).
General Tips
- If you hover your mouse over the line, it will display the location of the service delivery.
- Click CLEAR/ADD button at the top of the screen to continue adding entries.
- To view time entries for previous dates, change the date in the in the DATE field and the grid will update with entries for the date selected.
- Click on any column heading to change the sort order of the list.
- You will note a small black triangle next to the column name to designate which item you are sorting on.
- An upward triangle indicates that you are sorting in ascending order (A - Z), while a downward triangle indicates you are sorting in descending order (Z - A).
6/2023