
Client Master - Add Pay Group
When you are processing income/expenses, you select a pay group. The pay group tells the system which checkbook/account the money is linked to. Typically checkbook master and pay group master are very similar.
The steps to add a pay group vary depending if it is a shared pay group (one check book for all clients) or individual pay group (check book) for each client. Follow the directions depending on how your agency is setup.
Add a Shared Pay Group
 NAVIGATION: MAINTAIN menu > Client Master
- In the CLIENT NUMBER field, type the client number or use the magnifying glass to browse and select the client you need to create a pay group for. This will bring the selected Client to the current view.
- On the MAIN tab, look at the Pay Group Assignment grid
- Pay Group Column: select the combined pay group
- Go to the first blank line of the grid
- In the PAY GROUP column, click the browse icon
- A list of available pay groups will appear.
- Select the shared pay group, i.e., COMB - Combined Checking.
- Click OK.
- Description Column: when a valid pay group code is selected, the description will appear.
- Default Column: if this is the primary/default pay group for the client, check this box.
- Balance Column: the balance column will display the client's portion of the shared check book. See
- Press TAB to the next line to save or click SAVE at the top of the screen
Add an Individual Client Pay Group
NAVIGATION: MAINTAIN menu > Client Master
- In the CLIENT NUMBER field, type the client number or use the magnifying glass to browse and select the client you need to create a pay group for. This will bring the selected Client to the current view.
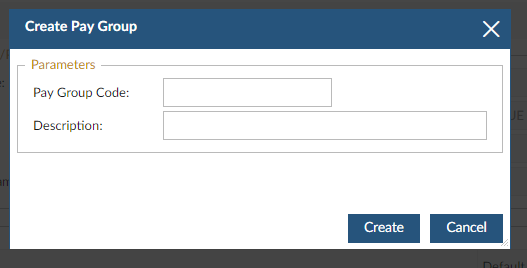
- On the MAIN tab, click the CREATE PAY GROUP button.
- Enter a Pay Group Code.
- When the code is created, the client number will be the first digits of the pay group. Then the code you enter will be displayed, i.e., 001-CB (client 001-checkbook).
- Use consistent numbering/naming when creating pay group codes, i.e., all checkbooks, petty cash, etc. The first digits will always be the client number - then the code you define.
- In the description field, type a description for the pay group. Typically this would include the client's name.
- Click CREATE.
- The new pay group will appear in the PAY GROUP ASSIGNMENT grid.
- Default Column: if this is the primary/default pay group for the client, check this box.
- Press TAB to the next line to save or click SAVE at the top of the screen
Modify an Existing Pay Group
NAVIGATION: MAINTAIN menu > Master Tables > Accounts Payable Tables > Pay Group Master
- In the PAY GROUP field, type the pay group or use the magnifying glass to browse and select the code you need to modify.
- Enter or select a pay group code.
- Make changes to any field that needs modified.
- Click SAVE.
1/2025